Hi, welcome to my blog. It has been a while since my last post. Nevertheless, in this post I will be showing you how to login to Cisco NXOS device using public key.
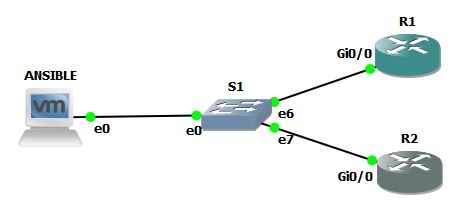
For this post, my topology looks like this:

The CentOS7 VM is in 192.168.198.132, and the NXOS mgmt interface is in 192.168.198.131. Both can ping the other with no problem. The switch in the middle is the GNS3 built-in switch.
OK, lets get started.
First, create your private and public key pair. I am using CentOS 7, and the command to generate private and public keys is ssh-keygen
[meru@localhost ~]$ ssh-keygen
Generating public/private rsa key pair.
Enter file in which to save the key (/home/meru/.ssh/id_rsa):
/home/meru/.ssh/id_rsa already exists.
Overwrite (y/n)? y
Enter passphrase (empty for no passphrase):
Enter same passphrase again:
Your identification has been saved in /home/meru/.ssh/id_rsa.
Your public key has been saved in /home/meru/.ssh/id_rsa.pub.
The key fingerprint is:
SHA256:SF7Yjys4maUAP/OXBdRtZEdkuUuJmrYjW9xs8X3ymjM meru@localhost.localdomain
The key's randomart image is:
+---[RSA 2048]----+
|      .. ooo=.   |
|     . o..oo.    |
|.     + o. . o   |
| o   o + o. +    |
|  =   + Soo. .   |
|   = * +++ o..   |
|    B +.+.+ . o .|
|     o.oo.    E= |
|      .o .    o+.|
+----[SHA256]-----+
[meru@localhost ~]$
If you see the output above, all I did was type in ssh-keygen and press enter. It will ask you where you want to save the private and public keys. The default location is /home/your-username/.ssh/.
Because I already created public and private keys pair when testing this method, the system asks me if I want to overwrite the existing keys, which I answered with a resounding "y". I left the passphrase empty to keep things simple, and press enter. Once this is done, the location of your private and public key are shown. If I do an “ls“, then the output looks like this:
[meru@localhost .ssh]$ pwd
/home/meru/.ssh
[meru@localhost .ssh]$ ls
id_rsa  id_rsa.pub  known_hosts
[meru@localhost .ssh]$
The private key looks like this:
[meru@localhost .ssh]$ cat id_rsa
-----BEGIN RSA PRIVATE KEY-----
MIIEpAIBAAKCAQEAxD82WOeqGnHctGwg3RW87NSVT8UnzkjkaNKELZ8rWStdvaRY
Iw1BcSMlVX/D9TIl7WreqYw7rPWutboPIKUV0fNATwjkykL+OqcPc5ZnAwVJYr5e
te2hPel+S4g5MxuMlkhBCgwrSDsyKriO38/iuv8WtTsT7CSCvWDdrAdy9r/mkD6P
OfXbBPgNvcP7cEj2dNj4BhEonDWTsm8v2SLdjEnhOTd5+wxpfrQE4+XnZIsKpYAT
qDtVEY3Sh+XsJnf/UTbfurVOCR6AfZhaHypHh93eP4DcD8giTS6uKW19eemNCEy/
OVkQfMFd2VvjVE+/PbGgZLnR4XKciBlrHZG8hQIDAQABAoIBAAqxcxGnFeK4/5Cp
L6U8UP4Km1QsZv3bhO6dQeyGdsM2FLaHpPHMABvdEWS2QIQ0xlJId3d/l6TWAj4O
tFJQDH9TJNbpoiXPPrENd08SC+zjNdt2igyZtSZ9eY8+DffV8XQi3cBhZ15ZM2OW
iNpzJmSQD7myTWSZnLIa/Bkqkr4VIFLkAtup84YTPxuBz8lxCtgrHk2HIz7MTqK2
EAqgxrAzgmEdH+huH8NuDKlTQnuCeTh6YFuyUR6om7MMvUJd6aOkokaXXdTW1V0W
nhFy2CGii1fYWDkjlBwR6anGo3X+1eiht/FD12v/G5g68CaayZyFMp3FTaLndijY
2s1d8SUCgYEA68C5hI85Ur3ZJvwX8kX6eOcIau4Ep1u+mMd4t7MkB17rtOAk6hmD
xw7ZDN66ZckQti7eNgjeF95zqFDnFFGc0lnrV2f7Vki9Hd5fdsmO1zXK7QiqGNv7
dXRMPHjJW4IP9I/Ed8bpaezLDN+UnOI/ChqH3VmdhdC8fHkoz8XsFE8CgYEA1Rno
kD8AjSaXLojUKQxsuPf89twoQ79iu52Pis9D6/jgrTMKmmEjHA2DEnJJIKESnakz
ntFtGGzUvqJ/NxkXZMWGCUZZlobpAWr2a+V+E5fHT/Vo2+Z2M26RmTZ2ToNVsge4
oLNUbnEZHVXuiIDowvOA/0ObXzD22wAHEgr1aOsCgYBdoCVNEsA2LvVNeTJdYhMt
7rq2FJ6+hD32WMmFUtyNHNJI+/dNDSL7a9chOFcYUziS0ZwoI29oVUzjXHXY6Ox5
0YIYLVBwnOSWNxj8iOF0cIWNizJaOwrrQ2t/XIzDDa0ed/YTh2htS7/79dMEVwmo
Do9EhfF8EkC4wjlGAplWGwKBgQCkmMplAASxAamsK8uTmSExDXq6QfpnuZ/NQjnp
AYZ48Va48L+z1muD83vV96g8J611UYepmCEnyIfaZzDTofHLyDVrXIc+GR5IFhIX
7L6g647rV6aSk0OhHjofmU1v/0llpUkZ9um0FG9NlV4U2Vzvl51/jPypXeyN40uS
yBwd2QKBgQDRVlQKvO3MIcQLAiqBKx+270W0W+qiNS/cwj0+zkaKj04yOiNBopPX
vBrfzsSWN7h69SgnOpkSGx3bQeNlLYZ9AMkw/TFnK/ZAYPyRTI7dJ/HnF1rXxsbO
RzpxdZsP7yOtqWotixrEfSHqlLn+kDzXj/7cSjiFDrwhoSTUMpNrkg==
-----END RSA PRIVATE KEY-----
[meru@localhost .ssh]$
And the public key looks like this:
[meru@localhost .ssh]$ cat id_rsa.pub
ssh-rsa AAAAB3NzaC1yc2EAAAADAQABAAABAQDEPzZY56oacdy0bCDdFbzs1JVPxSfOSORo0oQtnytZK129pFgjDUFxIyVVf8P1MiXtat6pjDus9a61ug8gpRXR80BPCOTKQv46pw9zlmcDBUlivl617aE96X5LiDkzG4yWSEEKDCtIOzIquI7fz+K6/xa1OxPsJIK9YN2sB3L2v+aQPo859dsE+A29w/twSPZ02PgGESicNZOyby/ZIt2MSeE5N3n7DGl+tATj5edkiwqlgBOoO1URjdKH5ewmd/9RNt+6tU4JHoB9mFofKkeH3d4/gNwPyCJNLq4pbX156Y0ITL85WRB8wV3ZW+NUT789saBkudHhcpyIGWsdkbyF meru@localhost.localdomain
[meru@localhost .ssh]$
OK, now we have done creating our public and private key pairs. In a production environment, you will want to keep the private key somewhere safe, and have a backup of it somewhere. Do not share this with others. The public key is the one that we want to put in to the Cisco NXOS device to allow us to login using public key.
In my previous post, I have shown you how to login to Cisco IOS device using public key, where you have to manually copy and paste the public key from your Centos machine to the IOS device. With NXOS, the copy and paste is done using “copy scp“ command. No more manual copy-and-paste.
Here is how its done:
1. login to your NXOS device
2. use the scp command. Here is how I do it:

NXOS#
NXOS# copy scp://meru@192.168.198.132/home/meru/.ssh/id_rsa.pub bootflash:
Enter vrf (If no input, current vrf 'default' is considered): management
meru@192.168.198.132's password:
id_rsa.pub                                    100%  408     0.4KB/s   00:00
Copy complete, now saving to disk (please wait)...
NXOS#
The output above shows the full copy command. I will try and break it down for you, and give a brief explanation:
copy –> this part is where we instruct the NXOS to do a copy command
scp –> this part is telling the NXOS to use the SCP method to copy the file
://meru@192.168.198.132 –> this part is informing the NXOS to login to the Centos 7 machine with the ip address of 192.168.198.132, using username meru
/home/meru/.ssh/id_rsa.pub –> this part is informing NXOS the public key’s location
bootflash: –> this part instructs the NXOS to copy the file to its bootflash directory
It takes zero seconds to copy the id_rsa.pub file from my Centos 7 machine to the NXOS. Now lets take a look if we have the file inside NXOS bootflash:
NXOS# dir | i id_rsa
        408    Aug 16 16:09:33 2020  id_rsa.pub
Yup, there it is. We have successfully copy our public key into the NXOS bootflash directory. Now to configure the NXOS to use public key everytime the user meru try to login. Here is how you do it:
1. lets create the username first, if you havent already.
NXOS(config)# username meru role network-admin password meru

2. configure that username to use sshkey file we just copied over.
NXOS(config)# username meru sshkey file bootflash:///id_rsa.pub

note: make sure you have created the username BEFORE you tell NXOS to use sshkey for that username, or NXOS will pop an error saying the username does not exists.
Lets verify the config:
NXOS# show run | sec username.meru
username meru password 5 $5$eQmmvOP3$kDQhGJqyBefA1cwoUTb5VMguZWSdjhfKXR.VqTp42E7
  role network-admin
username meru sshkey ssh-rsa AAAAB3NzaC1yc2EAAAADAQABAAABAQDEPzZY56oacdy0bCDdFbz
s1JVPxSfOSORo0oQtnytZK129pFgjDUFxIyVVf8P1MiXtat6pjDus9a61ug8gpRXR80BPCOTKQv46pw9
zlmcDBUlivl617aE96X5LiDkzG4yWSEEKDCtIOzIquI7fz+K6/xa1OxPsJIK9YN2sB3L2v+aQPo859ds
E+A29w/twSPZ02PgGESicNZOyby/ZIt2MSeE5N3n7DGl+tATj5edkiwqlgBOoO1URjdKH5ewmd/9RNt+
6tU4JHoB9mFofKkeH3d4/gNwPyCJNLq4pbX156Y0ITL85WRB8wV3ZW+NUT789saBkudHhcpyIGWsdkby
F meru@localhost.localdomain
username meru passphrase  lifetime 99999 warntime 14 gracetime 3
NXOS#
Yep, its there. That part where is says "username meru sshkey ssh-rsa AAAAB3Nza.....“ is telling us that the username meru has been configured to login using sshkey.
Now lets see if it works:
[meru@localhost .ssh]$ ssh meru@192.168.198.131
User Access Verification

Cisco NX-OS Software
Copyright (c) 2002-2016, Cisco Systems, Inc. All rights reserved.
NX-OSv software ("NX-OSv Software") and related documentation,
files or other reference materials ("Documentation") are
the proprietary property and confidential information of Cisco
Systems, Inc. ("Cisco") and are protected, without limitation,
pursuant to United States and International copyright and trademark
laws in the applicable jurisdiction which provide civil and criminal
penalties for copying or distribution without Cisco's authorization.

Any use or disclosure, in whole or in part, of the NX-OSv Software
or Documentation to any third party for any purposes is expressly
prohibited except as otherwise authorized by Cisco in writing.
The copyrights to certain works contained herein are owned by other
third parties and are used and distributed under license. Some parts
of this software may be covered under the GNU Public License or the
GNU Lesser General Public License. A copy of each such license is
available at
http://www.gnu.org/licenses/gpl.html and
http://www.gnu.org/licenses/lgpl.html
***************************************************************************
*  NX-OSv is strictly limited to use for evaluation, demonstration and    *
*  NX-OS education. NX-OSv is provided as-is and is not supported by      *
*  Cisco's Technical Advisory Center. Any use or disclosure, in whole or  *
*  in part of the NX-OSv Software or Documentation to any third party for *
*  any purposes is expressly prohibited except as otherwise authorized by *
*  Cisco in writing.                                                      *
***************************************************************************
NXOS#
Awesome! You can see that as soon as I entered the command “ssh meru@192.168.168.131", the prompt just went straight into privilege mode, not asking for a password anymore.
That is it for today. I hope this helps 🙂 See you on my next post!
Credits to NetworkEvolutions for showing me how to do this. You can find their Youtube video related to this topic in this link here: https://youtu.be/yvPMjfS_uCM
`